
 |
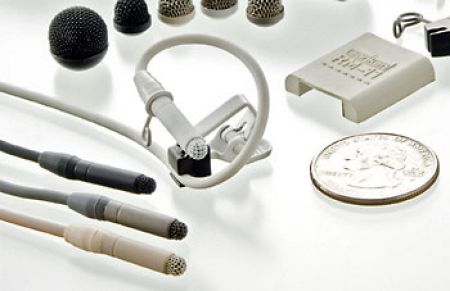
| The Sanken COS-11 lavalier mic and accessories. Notice the length of the capsule. |
A couple of my Sanken COS-11 lavalier microphones bit the dust lately. I had one cast member, a young mom, who routinely breast-fed her baby, often while wired with one of my lavs. Hiding a mic in wardrobe is sort of a black art, and further mystified by a nursing bra and a fussy, groping baby. No matter where I hid that lav, those groping hands would find it. Anyway, the kid managed to pull on it enough to create an intermittent where the wire enters the microphone. Sanken COS-11’s retail for about $350. Production bought me another mic and left me to play with the broken one.
Sound mixers gush about the great sound of COS-11 microphones. It seems no matter how it is oriented on wardrobe, or how it may be buried, it still sounds bright and natural. It is easy to hide. The cable is very soft and lays flat on the body’s curves.
Most miniature lavalier microphones are manufactured using hearing-aid capsules. These are the ultra-miniature microphones that are built into hearing aids. There’s probably a hundred or more different capsule models, by a range of manufacturers. The first really miniature lavalier, the TRAM TR-50, was based on a side-entry hearing aid capsule. I took apart an old TR-50, and I could see the logo and model number of the capsule printed on the back, and was able to source the capsule on the internet.
 |
| Tram TR50 Lav microphones contain Zero G 1506 hearing aid capsules |
Sanken COS-11’s are said to have the diaphragm (the membrane that vibrates in reaction to sound) run lengthways down the capsule case. The membrane can therefore be larger than the typical hearing aid membrane, which is as tiny as practical, and round. Some describe the COS-11 as a ribbon mic in a lavalier. True?
Well, I wanted to see if the sales pitch of the COS-11 is true. Does it have a large membrane, or just another hearing aid capsule in a long case?
The microphone body is permanently assembled and sealed. You really can’t take it apart without destroying it. So, as I offered up my $350 microphone to curiosity, I took some pictures of the dissection. Here we go.
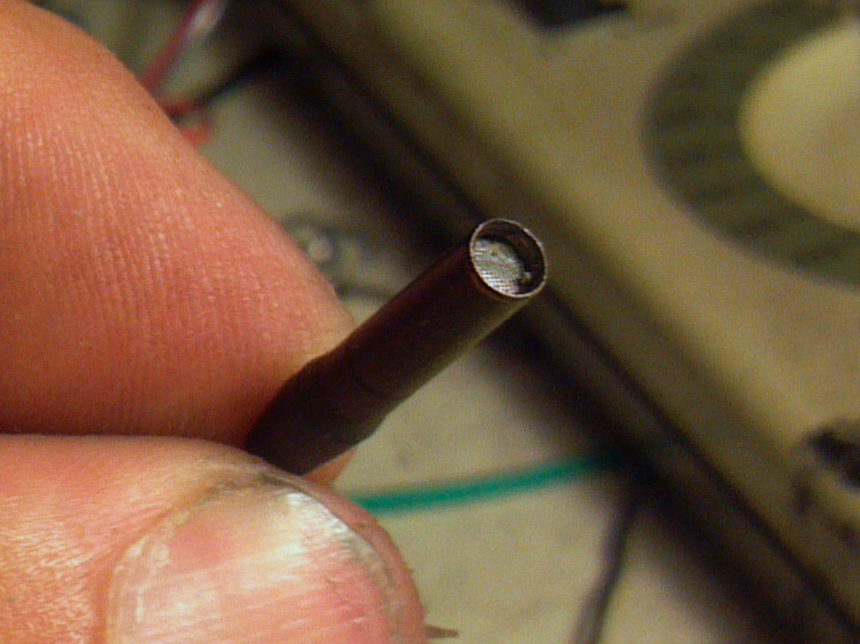
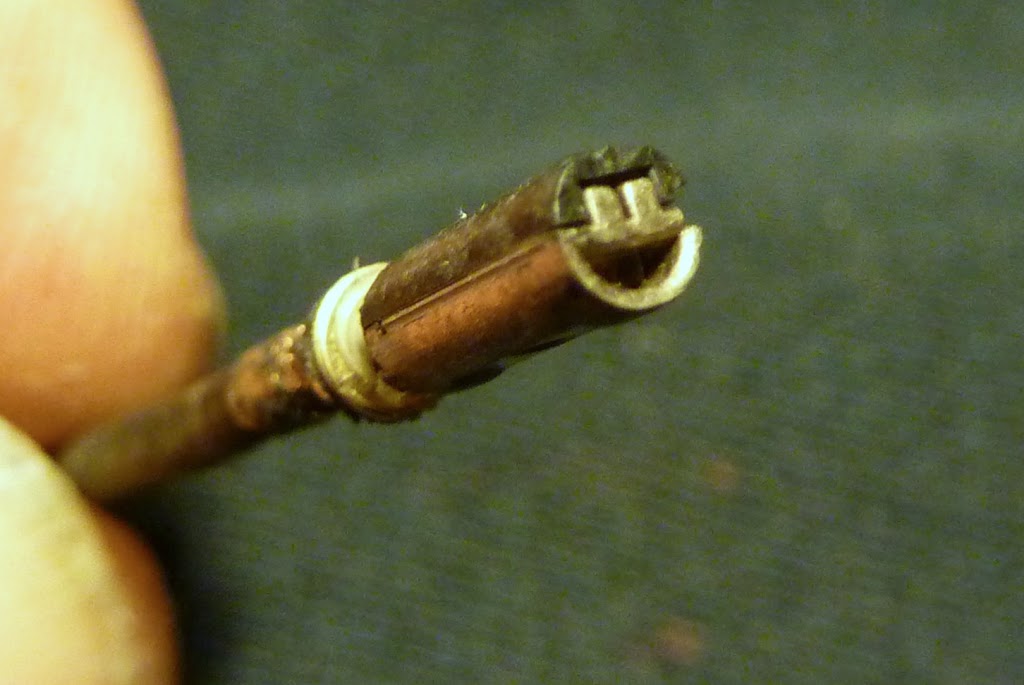
This is the COS-11 with the exterior windscreen removed. Inside, there is a fine mesh screen, presumably to help keep out dust and add a layer of wind protection. The exterior screen often falls off these lavs. Users who try to re-glue them with super-glue will destroy this interior screen, which sucks up the glue like a wick. (You need to use a thick epoxy that sticks to the walls of the case, and won’t pool up on the interior screen.) J.B. Weld is the most magnificent epoxy in the world.
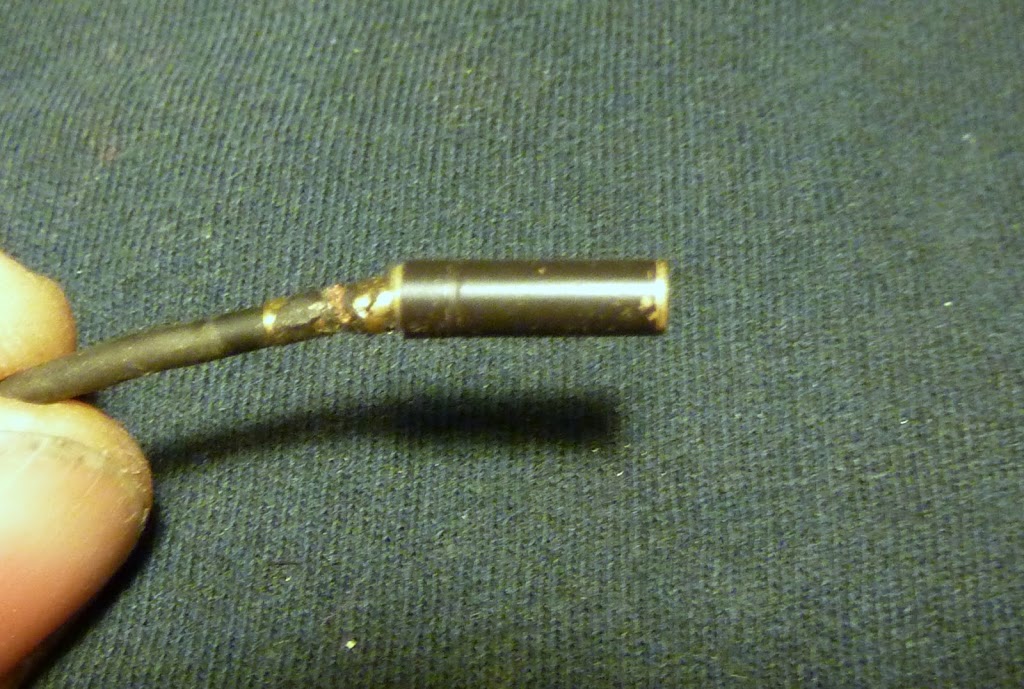
Here is the mic with the rubberized strain-relief removed. This was a thick, tough cover that protects where the wire enters the mic. Underneath, there is a metal collar that clasps the cable onto the underside of the case. The tubular case looks crimped on, but it is not. It is actually threaded, and screws on to the base. However, there is a leaf-spring securing the interior capsule inside the case. If you attempt to twist off the case, you will tear the wiring. One would have to secure the lower collar, and secure the interior capsule from the top, while unscrewing the outer case. Custom tools required.
I decided to cut the case open laterally with a Dremel Moto-Tool.

This cut presents a nice cross section of the mic, showing the screen and interior capsule. Onward…
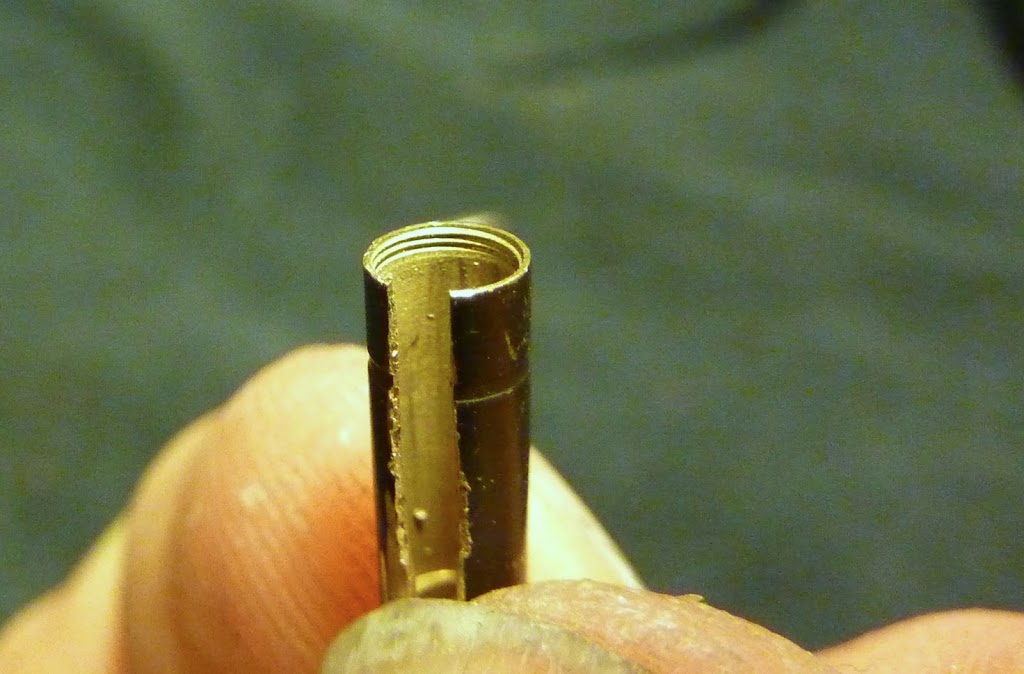
Here is the outer shell removed, the threads at the base are evident. Next…
The interior capsule exposed! A curious assemblage. the top half is plastic, the bottom half is metal.
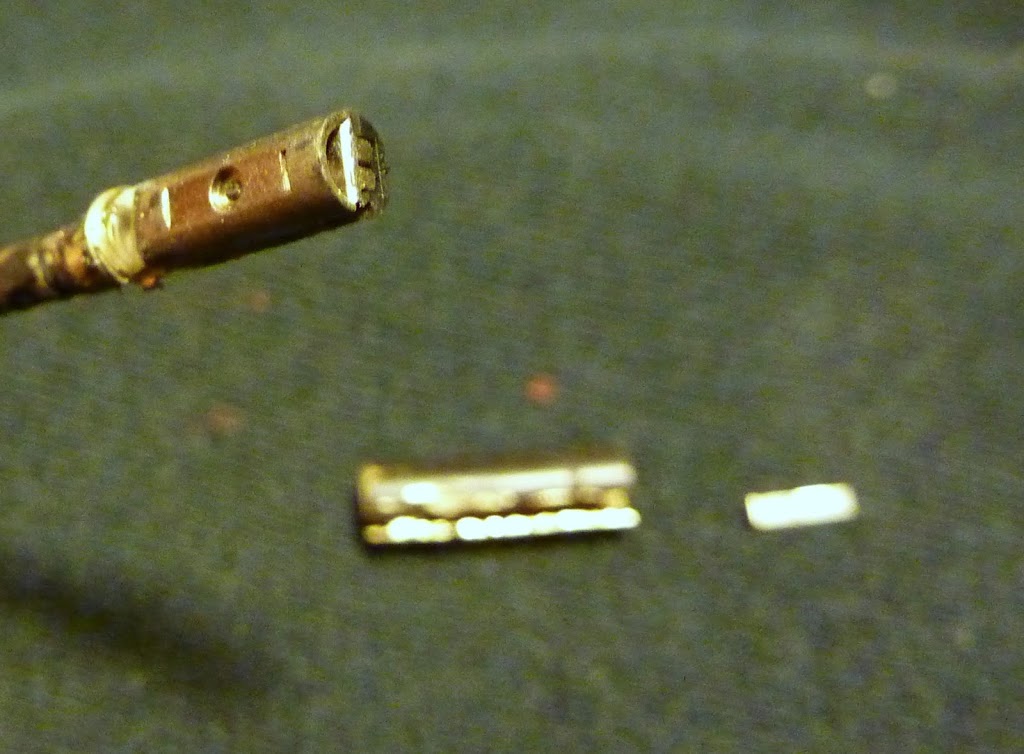
Here’s a view of the metal side. The indentation is where the leaf spring goes, which is that small out-of-focus thing in the background. I believe the dimple supports the FET inside the metal half.

Here’s the leaf spring in place on the capsule. This would certainly insure a good electrical connection between the capsule and the case.
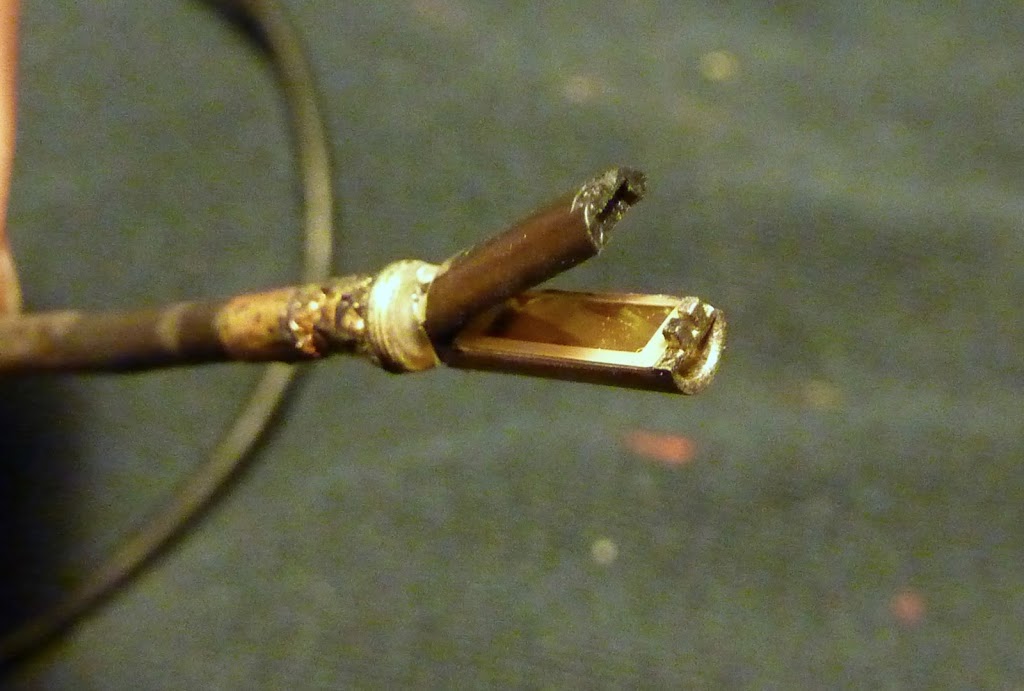
The two halves open like a clam-shell to reveal the delicate membrane inside. It is a translucent metalized sheet. In electronics, a capacitor, or condenser, consists of two plates separated by a dialectric, or insulator. What we seem to have here is one of those plates, served by the membrane.
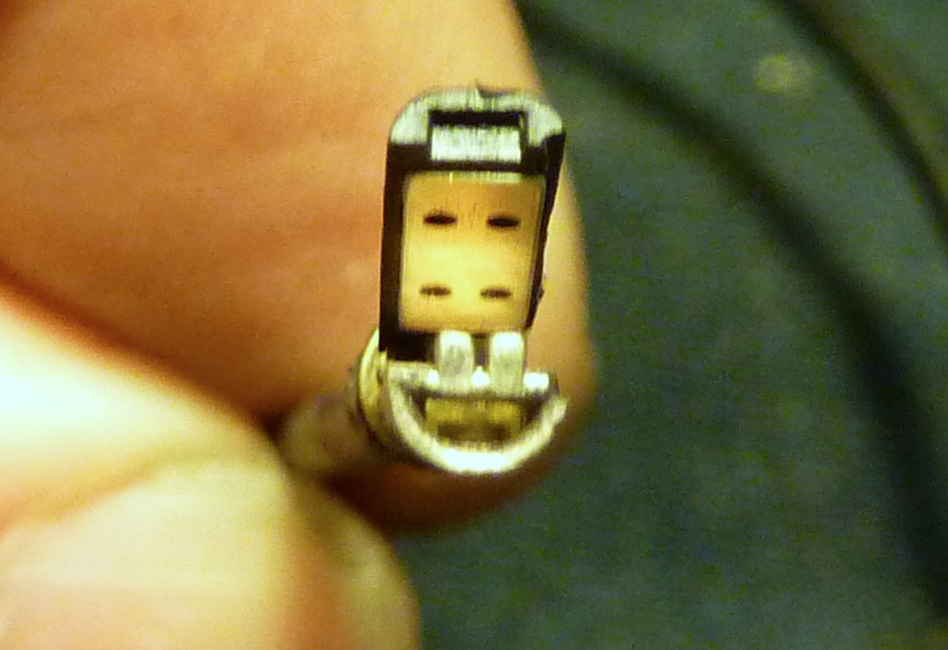
If we look down the clamshell, we see…. the other plate? Could it be that the dialectric is air, separating the two plates? Those who have wired a connector to a COS-11 know that the cable contains a black wire, white wire, and an uninsulated shield wire. These wires, impossibly short at the bottom of the mic, are soldered this way: White to the plate on the plastic side, black to the membrane & the metal side, and the shield- it either goes to the case, or terminates unconnected to anything. Side note: In many audio applications, the shield is not always connected to both inputs and outputs. One side or the other is often lifted to prevent hum issues.

In my final act of destruction, I pull away the two halves. One can see the translucent metalized diaphragm, and the opposing metal plate. Sound enters in through the top, and excites the diaphragm, creating minute changes in capacitance between the plates. This signal is amplified by the FET (field effect transistor). That diaphragm is about 6 times larger than a conventional hearing-aid capsule diaphragm.
Hence the “sound”, and perhaps other engineering of which I’m totally unaware…
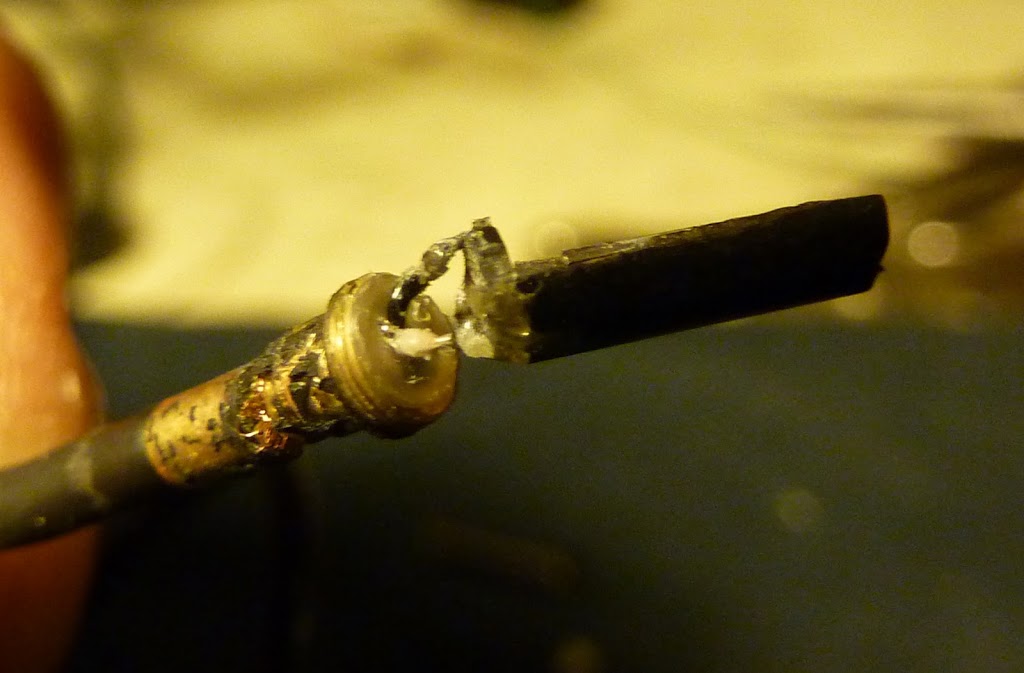
Finally, here is a close-up of the impossibly short wires that are directly soldered to the two halves of the capsule sandwich. No immediate evidence where the shield wire may be terminated. The threading on the base is visible. Again, one would need some special tools to unscrew the outer case while holding the base/interior capsule stationary. Otherwise, the wires would tear right off. What to do with the resulting mess? Maybe earrings…

Update- here is the metal base with the membrane removed. No FET, but a channel thru which sound enters from the top and is exposed to the length of the diaphragm. The FET must be on the plastic half of the sandwich.

-by Pete Verrando Please visit my home pages at www.txsound.com